Pages

Showing posts with label Contributor-Kristi. Show all posts

Thursday, February 24, 2011

DIY Airplane Save The Date {Or Invitation}

by contributor Kristi Delfino

Hello my dears!  Do I have a special treat for you today - A Luna and Chloe original design!  Hopefully by the end of this post you will be flying high...he he.  Okay, so I was talking to a friend recently about destination weddings, and it got me thinking...if I was having a destination wedding how would I do my Save the Date announcements.  And in just a matter of seconds it hit me.  I might be dating myself here (eek), but do you remember the balsa wood airplanes, or jet gliders that you would get from the store for $.50 or so?  You would assemble them in seconds, and having them take flight all over the house or yard. 
My brother and I used to fly them down the staircase growing up when we lived in an old victorian home.  However, me being the younger one, I usually was the one that had to go down and get them and bring them back up!  Typical, no?
Anyhow, I put the two together (a destination wedding and jet gliders) and this is what I came up with...
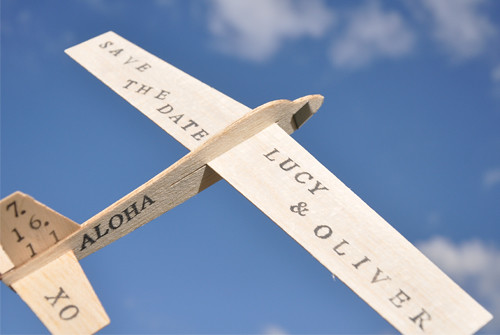
Airplane-STD-6
I am OVER THE MOON about how they turned out! I purchased the jet glider for $1.00 at Michaels.  And while it has writing on each side of the pieces, I just flipped them over and used the undersides. There was a small stamp on the underside that said where it was made, but with a little sandpaper it came right off. Ooh, and the sandpaper is fabulous for fixing a mistake if made. Just wait for the ink to dry before you sand off, and don't rub too hard. Now, I know exactly where to get the jet gliders without anything on them (granted they are shaped a little differently), but I couldn't justify spending over $30 and receiving over 30 of them, when I only need 4 for this project.
Here are the supplies that are needed for making a Save The Date plane:
  1. Jet Glider
  2. Fine sandpaper (optional)
  3. Letter and Number stamps
  4. Stamp pad
I included some other items in the picture below that I used.  However, you only need the four items above to actual make them.
Airplane-STD-Supplies
All you really have to do is stamp...
Airplane-STD-Process
I made a custom envelope for them, added a piece of chipboard to protect the plane from breaking in the mail, and then added some little details...
Airplane-STD-Step-by-Step
And voila!  They are ready for take off...
Airplane-STD
Yet, don't think I stopped there...oh no!  I tried to think of another, possibly eaiser way to use too.  And here's is another option for you that I came up with...
Airplane-STD-Banner-2
For the banner you could either print it up (the easy way), or stamp it (a little more time consuming).  Since I started with stamps, I figured I would continue with them! 
Airplane-STD-Banner
I glued the twine and a very thin piece of chipboard that I cut to the back of the banner.  I didn't want the paper to bend or fold, so this gives it some stability.  Also, I glued one piece of twine to the top of the back of the plane and one piece to the bottom to attempt to keep the banner straight when flying through the air. 
In talking with my sister the other day about my idea, which I knew she would love, she was ecstatic to say the least!  She has a little boy (Baby Riley is what I call him, with the most fabulous red hair EVER) that is turning one soon.  Well...guess what?  Oh yes, these are perfect for a boy's birthday party...or a girl's too. 
And even if you aren't having a destination wedding you can still use these if you love to travel, are a pilot of just for the fun of them! 
There are so many ways to customize them too, and you could always use a colored stamp pad instead of black.  And for those of you that love the idea....but don't want to make them yourselves, I am offering custom made Save the Dates or Invitations in my Etsy store if you are interested, as well as the little stitched heart on the tag.  They will be available for purchase in my Etsy store come Monday, February 28th!
 ~ Ciao
...concept, design, styling & photography all by luna and chloe weddings 

*** Both the airplane save the date and the stitched key tags are my ORIGINAL designs. PLEASE do not copy, and pass it off as your own! I am sharing with you how to make the airplane save the dates out of kindness, return the favor. Thank you bunches!


Tuesday, January 25, 2011

Your Ticket To Love - Bridal Shower

by contributor Kristi Delfino

With all the warmer weather we have been having this last week I am ready for Spring!  I bet you are too.  Well with Spring on my mind, I decide to put together a Pink and Green Spring photo shoot for you...all inspired by some tickets that I found at Michaels.  There are lots of ideas here that can easily be done for a bridal shower or wedding, or a baby shower, birthday, etc...  So let's get started shall we?
Escort-Area
Just a small, simple escort area to start with.  I adore using vintage frames for a variety of projects.  For this escort area I trimmed a piece of foam core board to fit the frame, and covered it with some material.  A large white tag (that goes through the printer nicely) has a guest name and a ticket with the table they are to sit at.  I kept thinking of how I would love a ticket to 'BLISS', wouldn't you?  Anyway, next we have a small bar area...
Homemade
I love using apothecary jars for ice!  And with just a couple of other elements - the tickets on the stir sticks, the fabric covered coasters, fabric tags on the bottles, and the yarn braids (this is the tutorial I used) - you can tie everything together for a cohesive look.  Continuing on with my pink and green Spring theme, I brought the same elements (and some new ones too) to the table...
Table
Tickets stuck on painted wood blocks makes for a easy table marker.  And lastly, the small dessert area...
Dessert
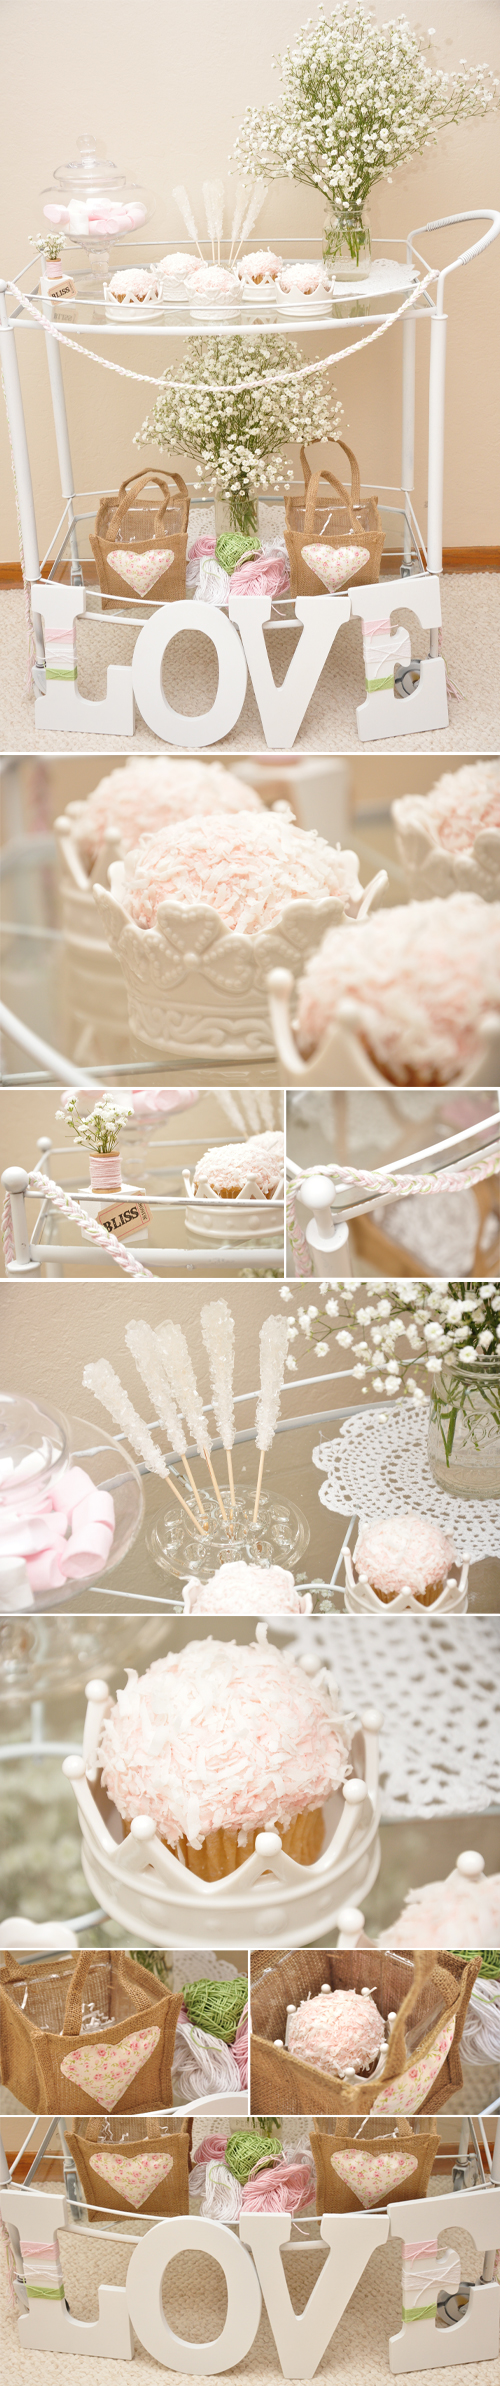
I found the crowns at Michaels for $3.99 each.  When I saw them, I thought they were the perfect size to hold a cupcake, and would be a great favor for guests to take home - a crown and a cupcake that is!  The burlap bags are from Beverly's, and there are so many ways in which to use them.  I decided to stitch on a heart to fit in with the whole theme.  The bags come with a plastic liner - so you can use them for plants, office supplies, etc...  You can see my tutorial on how to make them.  Hope you enjoyed this photo shoot today, and that I provided you with some inspiration!
~ Ciao
...concept, design, styling & photography all by luna and chloe weddings


Tuesday, January 11, 2011

A Cameo-Inspired Celebration

by contributor Kristi Delfino

Hello dear readers of Celebrations at Home! Kristi here from Luna and Chloe Weddings. I have to tell you that I was over the moon (what I say when I am really excited) when Chris asked me to be a contributor on Celebrations at Home. I know she provides bunches of amazing inspiration on a daily basis, and to think that she trusted me to inspire you - well I am honored!

Every event that I design is usually inspired by one element, no matter how large or small. For this design I was inspired by cameos, and everything just fell into place from there. This is a fabulous idea for a bridal shower, but would be perfect for a girls night, a birthday party, etc...

First up is the escort area. To me escort areas are very important, as they let your guests know where to sit and gives them something to do. The first couple of minutes at an event can sometimes be awkward if you don't know a lot of people, and finding their seat, who they are sitting next too, etc...all helps get your guests mingling. For more intimate affairs when only one table is used - I still use an escort table to give guests a warm welcome, and usually something little - not a favor per se, but something. So here is the escort area that I created ...
Cameo-Photo-Shoot-Escort-Ta
I used cameo's I found at Michaels and tied a bow at the top.  I attached them with pins to necklace displays, also found at Michaels.  Below is the tablescape...
Cameo-Photo-Shoot-Table-Fin
I added strips of black velvet ribbon down the center of the table, as well as wrapped around the napkins to bring the black velvet onto the table.  A cameo shaped craft punch works perfectly to punch out printed names to place on top of the napkins.  The final touch, was two cameo's tied around the two center vases.  (All mercury glass is from Home Goods and Target.)  And lastly, the dessert table...
Cameo-Photo-Shoot-Dessert
I used fancier necklace displays (also found at Michaels) to hold some special silver heart necklaces.  I made the necklaces using ribbon, glue dots, and chocolate from Sees.  And my homemade cake was simply finished with a cameo.  So there you have it - a cameo inspired bridal shower.
~ Ciao

...concept, design, styling & photography all by luna and chloe weddings


FYI, after creating this gorgeous post, Kristi stumbled across these Cameo Candy Molds that would be the perfect addtion to the theme:
cameo candies via Country Living
Related Posts Plugin for WordPress, Blogger...